Showing posts with label Appetizers. Show all posts

Gramercy Tavern Mixed Spiced Nuts Recipe
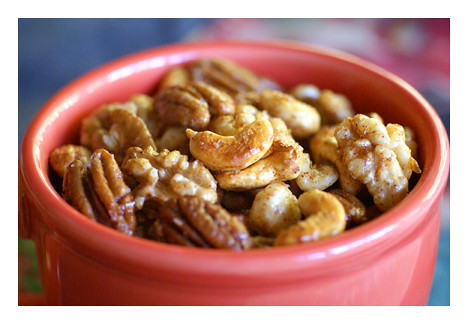

Gramercy Tavern Mixed Spiced Nuts, originally uploaded by A Gluten-Free Guide.

My friend Fabrizio recently shared with me an Italian proverb: “Quello che si fa il primo dell’anno si fa tutto l’anno.” Translated: "That which you do at the beginning of the year you will do the rest of the year. " As 2007 ended, filled with family, friends, cooking and laughter, I can only hope to have even more of these treasures in 2008.

While home in California for the holidays, enjoying every moment with my new nephew, I had the opportunity to try out a few new recipes and revisit some classics. This recipe for spiced nuts was given to me during one of my delicious gluten-free dining experiences at Gramercy Tavern. The spice mix is quite large but as the bulk is sugar and salt, it’s not prohibitively expensive even if you only make the nuts two or three times.

Spice Mix
1/4 cup salt
1 1/2 cup sugar
2 teaspoons cinnamon
2 Tablespoons cumin
1 teaspoon cloves
1/2 cup cayenne
1/4 teaspoon nutmeg

Mix all ingredients and store in an airtight container for up to six months.

Gluten-Free Spiced Bar Nuts Recipe
1 Tablespoon sugar
1 Tablespoon water
2 Tablespoons corn syrup
1 1/2 cups raw unsalted cashews
1 1/2 cups raw unsalted pecans
1 1/2 cups raw unsalted walnuts
1 Tablespoon spice mix

Preheat oven to 325 degrees.

Heat sugar and water together in a small saucepan to form a simple syrup. In a mixing bowl, toss nuts with simple syrup and corn syrup to coat. Add spice mix and continue to stir.

Spread nut mixture evenly on a baking sheet lined with parchment paper.

Toast for 15 minutes, turning pan every five minutes. Cool completely and store in an airtight container for up to 30 days.

I now plan on experimenting with different combination of nuts and seeds. Almonds instead of cashews? Or maybe an Allergic Girl friendly version with peanuts and sunflower seeds?

Happy New Year! I appreciate every comment and email. Thank you for an incredible 2007. I wish you love, health and deliciousness in 2008.

Spice is Nice


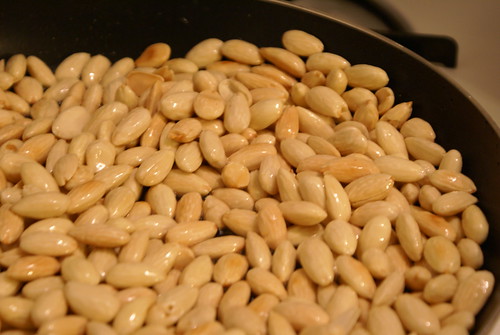
After a week in Southern California, enjoying some delicious Mexican Food, I thought it was time to share a spicy recipe infused with Mexican flavors. Another great find from Donna Klein's Gluten-Free cookbook, these toasted tex-mex almonds will kick up the flavor and dance on your tongue. As a bonus, this recipe is really easy to prepare, much less time-intensive than my Mexican tamales.


Toasted Tex-Mex Almonds

3 tablespoons canola oil
3 cups whole blanched almonds
1 ½ teaspoons garlic salt
1 teaspoon gluten-free chili powder
1 teaspoon ground cumin
Pinch cayenne pepper

In a large nonstick skillet, heat the oil over medium heat. Add the almonds and cook stirring, until golden, about 5 minutes. Remove from heat and, using a slotted spoon, immediately transfer to a heatproof bowl. Add the remaining ingredients to the nuts, tossing well to thoroughly combine. Transfer to a baking sheet and spread out in a single layer. Let cool to room temperature before serving. (Cooled nuts can be stored at room temperature in an airtight container for a few weeks.)

Trails of Memories and New Experiences


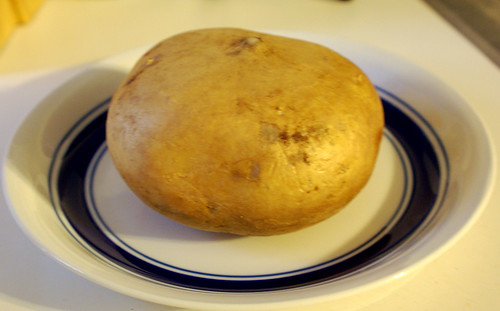
It’s weird the things that are emblazoned in our memories. I remember very clearly the first time I saw cut up jicama at a Whole Foods in San Francisco. Why is that memory so vivid and rich when I sometimes can’t remember things I did a few days ago? Perhaps it's the tactile nature of eating and the multiple senses it engages that leaves such vivid images in my mind. That's probably why there can be thousands of food blogs and we don't get tired of reading, looking at pictures and enjoying other people's experiences with food. Ok, back to San Francisco.
I saw a container of unidentifiable white cubes amongst the fresh cut fruits and veggies. The label said jicama and there was a lime sitting on top. The whole container cost less than $3 so I decided it was worth a try. When I got back to my computer I looked it up jicama on the Internet (have to find out that nutrition information to dose my insulin). FreshDirect’s web site has become my de facto source for food information and nutrition facts. Their description is great: “Jicama is all about crunch. Its flavor is slightly nutty and fruity, almost like an apple, but its real virtue is its light, juicy crispness. It resembles water chestnuts (for which it can substitute easily). You can boil jicama like a potato, but we prefer it raw. In Mexico, chilled jicama slices seasoned with chili powder, salt, and lime juice are a favorite cocktail snack.”

Since my first foray into the world of jicama in San Francisco I have been pleased to find it in dishes at Candle Café. Recently I decided to make a jicama appetizer for a dinner party. Because my local Whole Foods doesn’t have it pre-cut I had to find out what the root looks like and how to peel and chop the rather unwieldy thing. The first time around was definitely not easy. My Knife Skills 1 class at ICE did not prepare me for this. I’ve since become more adept, though I did have a small accident involving a dull chef’s knife, a jicama root and my fingernail. (It hasn’t kept me from integrating jicama into my diet on a much more regular basis.) I've had some trouble finding jicama at my "regular" grocery stores so you may need to go to a produce market or Whole Foods if your local market doesn't stock it.


Give these spicy chips a try, but unless you are knife skills master allow some time and extra jicama for practice.

Spicy Jicama Chips (from Donna Klein’s Gluten Free Vegetarian Kitchen)

1 large jicama (about 12 oz), peeled, quartered, and thinly sliced
Juice of 2 limes (about 1/3 cup)
½ tablespoon gluten-free chili powder
Salt and freshly ground black pepper to taste

Place the jicama slices in a shallow nonreactive dish and add the lime juice; toss well to coat. Let marinate for 30 minutes at room temperature, tossing a few times. To serve, drain the jicama chips and transfer to a serving platter; sprinkle with the chili powder, salt and pepper.

I have also tried these with just a dash of cayenne. For you spice lovers, it really ratchets up the heat.

It's All About The Cheese

As anyone who knows me or has been reading this blog for a while knows, I love cheese. I love tasting new cheeses, planning a cheese “course” for a party or picking cheeses for an appetizer or dessert at a restaurant.

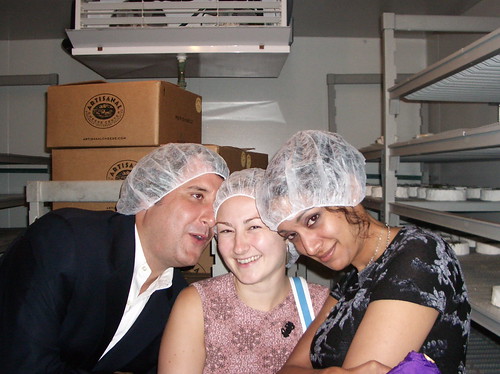
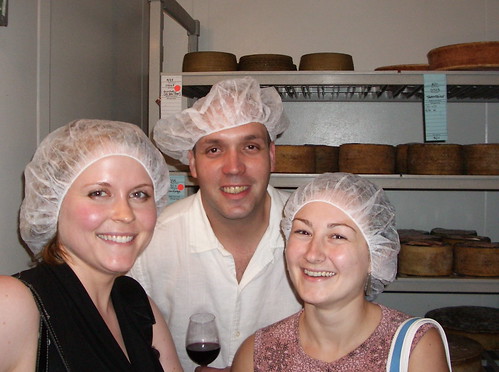
I took a Cheese 101 class at the Artisanal cheese center in Manhattan two years ago with my friends Erica and Sumita. After that class I bought “The Cheese Plate” by Max McCalman, who led our course. He is the rock star fromager for all of the Terrance Brennan restaurants, including Artisanal. After our class was over, Erica was able to get us an exclusive tour of the cheese “caves” where the fromagers care for and age the famous artisanal offerings.

Last week, my friend Susan joined me for a French cheese class at Artisanal lead by Fromager Daphne Zepos. We were served a selection of French cheeses and given background information about each of the cheeses as she led the tasting. Even with my knowledge of cheese, the class was enlightening and delicious.

For example, did you know that while wine was always aristocratic fare, cheese was once considered a humble food? It began as a way to preserve the milk so that farmers could survive in the lean winter months (necessity is the mother of invention after all). The aristocracy and landowners would collect the more "ephemeral" cream and butter products and leave the cheese for the farmers. I also learned that women traditionally made goat’s milk cheese. Goats were considered of “the devil” and men didn’t have the patience to deal with the temperamental beasts. It therefore became the chore of the wife to take care of the goats. The residual effects of this can be seen in the small and delicate forms many goat cheeses take. It’s a woman’s imagination that ties little packages with such care.

When looking to pair cheese with food or beverages, ideally you find pairings that elevate the taste of each. Apparently sommeliers tend to recommend cheeses that will elevate the wine and some fromagers recommend wines that elevate the cheese. There are combinations however that can elevate both. For the yogis and others that avoid alcohol, you don’t have to feel left out; here is an article on how to use juices to the same effect.

While most cheeses are gluten free, I was concerned when I discovered that one of the cheeses on our plate was dusted with breadcrumbs. (Click on the photo to go through to Flickr and see which cheese is which.) I of course avoided the breadbasket placed on each table, but was pleased to learn that fromagers consider bread merely a palate cleanser. According to Daphne, bread hinders your ability to really taste the cheese and therefore should only be eaten between each cheese. So I was perfectly happy to use water as my palate cleanser and have an expert fromager give me an additional reason for banishing bread from my cheese services.

Cheese plates are a fun way to get creative with your palate with no actual cooking time. Let me know if you find some new favorites. (and Amber, we are going to find a Sheep's milk cheese for you!)

Gluten Free Bean Spread


The holiday party was a resounding success. I am still getting all of the pictures and recipes together. In the meantime, here is a delicious bean dip that can be used with tortilla chips, crudités or as a bruschetta spread.

I love this recipe because it tastes light and fresh – unexpected with a bean dip.

Gluten Free Garlic Bean Dip (adapted from Real Simple Magazine)

2 15-oz cans of drained cannellini beans
1/3 cup chopped Italian flat leaf parsley
2 tablespoons extra virgin olive oil
1 tablespoon fresh lemon juice
2 garlic cloves
1 teaspoon kosher salt

Combine all of the ingredients in a food processor fitted with the metal blade. Process until smooth.

Serve at room temperature.

You can prepare this dish a day or two in advance and keep in the fridge. Try to take it out of the fridge a couple hours before serving to bring back to room temperature for the party. You will have a hard time keeping the crudités platter stocked as long as this dip is around…

Gluten-Free Rosemary Roasted Cashews

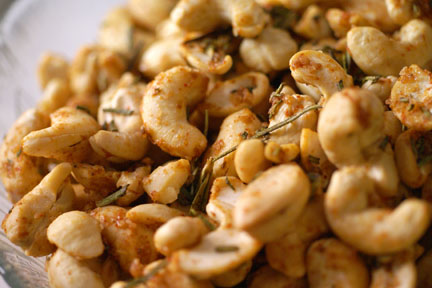
Rosemary Roasted Cashews III

I am busy preparing my gluten-free Thanksgiving feast today. I hope you are enjoying the holiday with your loved ones. Here is just a taste of what I will be serving this afternoon.

This recipe has become one of my all time favorites. I serve it frequently at dinner parties. My family requests this more than any of my other concoctions. It’s the kind of dish that will have people calling you begging for the recipe. It’s so simple and no gluten in sight.

This recipe for rosemary roasted cashew nuts was adapted from The Barefoot Contessa on The Food Network. (Ina Garten will never lead you astray!)

1 pound raw cashew nuts
3 tablespoons coarsely chopped fresh rosemary leaves
1/2 teaspoon cayenne
2 teaspoons dark brown sugar
2 teaspoons kosher salt
1 tablespoon melted butter

Preheat the oven to 325 degrees F.
Place the nuts on an ungreased baking sheet and bake for 8 - 10 minutes until they are warmed through. Combine the rosemary, pepper, sugar, salt and butter in a large bowl. I like to melt and add the butter to the rest of the mixture about 2 minutes before the nuts are done roasting. Toss the warm nuts with the rosemary mixture until the nuts are completely coated.

These are best served warm, but they store well and are still quite delicious days later. Just give the mixture a good stir since much of the rosemary will fall to the bottom.
Enjoy this naturally gluten free appetizer or snack.