Showing posts with label Desserts. Show all posts

Gluten-Free Cheesecake - better than the original!

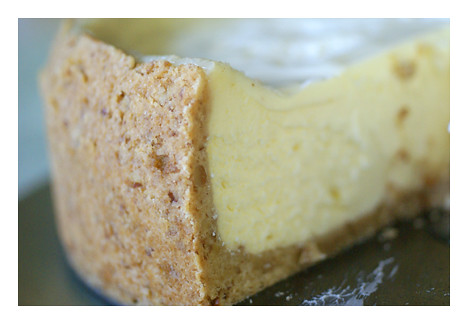
While I posted about this gluten-free cheesecake last year when I made it for Thanksgiving, I made it again for the holidays this week. My brother (who does not bestow praise often) declared it the best cheesecake he has ever tasted. It's a great example of simple ingredients bringing out spectacular results. I hope you are enjoying some time with family, friends and perhaps some deliciously simple food.

I live in New York City, a place known for its cheesecake. Before I had Celiac disease, a trip to Carnegie Deli for cheesecake was taken with each new visitor I helped to explore Manhattan. Carnegie Deli cheesecake is delicious, but I was never a fan of the crust. To me a cheesecake needed a graham cracker crust pure and simple.

One of the first gluten free treats I set out to conquer was crust. Pie crust and cheesecake crust – I needed to be a part of the holiday tradition. Well, much to my surprise, I was able to make a crust that is even more delicious with cheesecake than the graham cracker crust for which I had longed. Who knew that eating gluten free would keep delivering these small gifts at my door?

I served this cheesecake for dessert at Thanksgiving this year. I just wish it had fewer calories so I could indulge on a more regular basis!
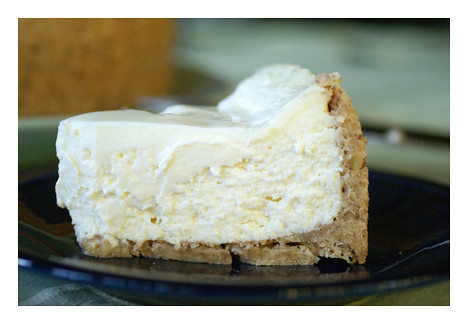

Gluten Free Cheesecake with Nut Crust Supreme (Cheesecake recipe is from my Aunt Barbara, the crust is adapted from Bette Hagman’s “The Gluten Free Gourmet Bakes Dessert”)

Preheat oven to 350 degrees

Gluten Free Nut Crust Supreme
2 cups Pamela’s Gluten Free Baking Mix
½ cup dark brown sugar
2/3 cup cold unsalted butter, cut into pieces
1 cup finely chopped pecans

Spray cheesecake pan lightly with vegetable oil spray. In a medium bowl stir together the flour mix and brown sugar. Cut in the butter until fine crumbs form. Stir in the nuts and pat into your pan. The crust will be “crumbly” but will hold together once pressed into the pan. This will be more than enough for one large cheesecake and perhaps for a second smaller pie. Though it tastes so good on it’s own you may just end up eating it!

Barbara’s Classic Gluten Free Cheesecake
4 – 8 oz bars of gluten free cream cheese, softened
1 cup of granulated sugar
2 eggs
¼ teaspoon salt
1 teaspoon gluten free vanilla

Mix all of the ingredients with a beater until smooth and pour into the unbaked crust. Place in preheated oven for 30 minutes.

While that is baking, prepare the topping.

2 cups gluten free sour cream
¾ cup granulated sugar
½ teaspoon of gluten free almond extract
Juice from ½ a lemon

Mix the topping ingredients in a bowl. After the first 30 minutes of baking, remove the cheesecake and spoon the topping onto the cheesecake. Be careful not to overfill the pan. Return the cheesecake to the oven and bake for an additional 10-20 minutes. You may want to place a piece of foil under the cheesecake just to catch any drippings. Cooking times can vary dramatically depending upon the amount of topping you choose to use. Watch to see when it starts to solidify but don’t let it stay in so long that the crust begins to burn.

This recipe is easy to make but incredibly scrumptious, I promise.


The Best Gluten-Free Brownies Recipe


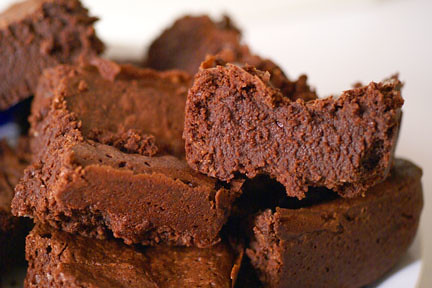
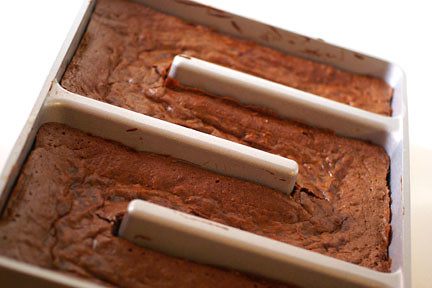
My friend Heather, in San Francisco, is a fantastic cook. I take any cooking advice from her as fact. When she recommended a recipe for the BEST BROWNIES EVER, I did not take it lightly. I decided to put her hyperbole to the test and try a gluten-free version for my next party. This was an interesting gluten-free baking experiment because there were so many new factors – I was trying a new recipe, a new gluten-free flour mix and a new cooking technique – The Baker’s Edge pan. I usually stick to one new element for my cooking experiments, but fate smiled upon me and despite all of the previously untried factors the brownies lived up to Heather’s declaration as the best (gluten-free) brownies ever.


I highly recommend the Baker's Edge pan. I first discovered it when I was experimenting with a gluten-free version of David Lebovitz's Fruit and Nut Bar recipe. I worried that it would be difficult to get the brownies out of the pan or to clean up afterwards, but it really worked like a dream. It's a bit of a luxury, but how many luxurious things in today's world cost less than $40?


The Best Gluten-Free Brownies Recipe (adapted from the Tartine Bakery Recipe)

3/4 cup unsalted butter
1 pound gluten-free bittersweet chocolate, coarsely chopped
3/4 cup gluten-free flour mix (I used Deby’s Gluten-Free flour mix – made with rice flour, potato starch, tapioca flour, salt, and xanthan gum)
5 large eggs plus 1 egg white
2 cups light brown sugar, lightly packed
1/ 2 teaspoon salt
1 teaspoon vanilla extract

Preheat the oven to 350 degrees. Butter a 9-by-13 inch glass baking dish.

In a small saucepan, melt the butter over low heat. Melt the chocolate in a double boiler and add the melted butter. Remove from the heat and set aside to cool.

Sift the flour into a small mixing bowl. Set aside. In a medium mixing bowl, combine the eggs, sugar, salt and vanilla. Using a mixer fitted with the whisk attachment, beat on high speed until the mixture thickens and becomes pale in color and falls from the beater in a wide ribbon that folds back on itself and slowly dissolves on the surface, 4 to 5 minutes.

Using a rubber spatula, fold the cooled chocolate into the egg mixture. Add the flour and fold it in quickly but gently with the rubber spatula so that you don't deflate the air that's been incorporated into the eggs.

Pour the batter into the prepared dish and smooth the top with the spatula.

Bake until the top looks slightly cracked and feels soft to the touch, 25-30 minutes. Let cool completely on a wire rack.


Using a sharp knife, cut into squares. The brownies will keep in an airtight container in a cool place for up to 1 week. Though I can't imagine them sitting around for that long - they are just that good.


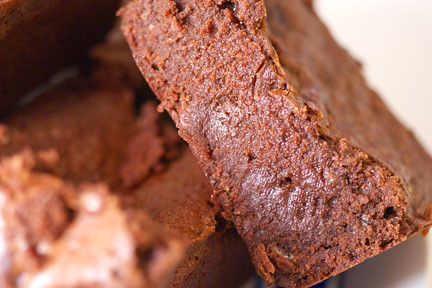
You can't use a cake tester or toothpick to judge doneness. Because the batter has a high percentage of chocolate, the tester comes out wet even if the brownies are done. But look at that gooey chocolate goodness!

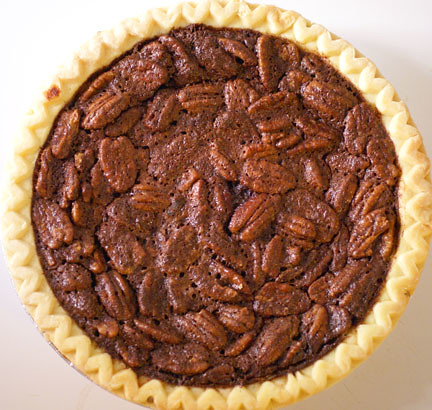
Gluten-Free Chocolate Pecan Pie Recipe

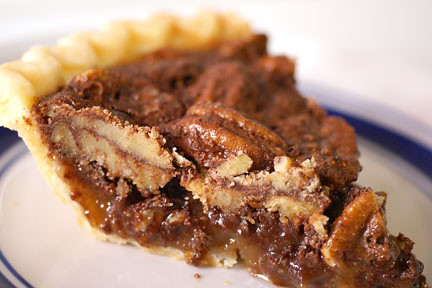
Oh Whole Foods, I already loved you but now you truly have my heart. Why am I expressing such love for a grocery store? Well, aside from all of the wonderful gluten-free products that Whole Foods has carried for years, they recently added frozen gluten-free piecrusts to their Gluten-Free Bakehouse line.While in general, I prefer to make things from scratch, a flaky, gluten-free pastry crust is not that easy. I used the Gluten-Free pantry mix to make crust for a delicious gluten-free pumpkin pie last year. But when the Delphi Celiac Forums started buzzing about the Whole Foods frozen piecrusts, I knew I had to find a pie recipe to try them out. The results were incredible, the Chocolate Pecan Pie and the crust were a huge hit at my holiday soiree this year.


Gluten-Free Chocolate Pecan Pie (adapted from Karo Syrup Recipe Collection)

3 eggs
1 cup sugar
1 cup dark corn syrup
5 ounces semisweet gluten-free chocolate
2 tablespoons butter, melted
1 teaspoon gluten-free vanilla
1 1/2 cups raw pecans
1 (9-inch) unbaked or frozen deep-dish pie crust

Preheat oven to 350°F.

In a double boiler, gently melt the chocolate and set aside to cool slightly. If you don’t have a double boiler, set up a large pyrex bowl over a saucepot with simmering water.

In medium bowl, beat eggs slightly with a fork. Add sugar, Corn Syrup, chocolate, margarine and vanilla; stir until well blended. Stir in pecans. Pour into pie crust.

Bake 50 to 55 minutes or until center of pie appears barely set. Cool on wire rack.

To use prepared frozen pie crust: Place cookie sheet in oven and preheat oven as directed. Pour filling into frozen crust and bake on preheated cookie sheet.

TIPS: Pie is done when center reaches 200°F. Tap center surface of pie lightly - it should spring back when done. For easy clean up, spray pie pan with cooking spray before placing pie crust in pan. If pie crust is overbrowning, cover edges with foil.

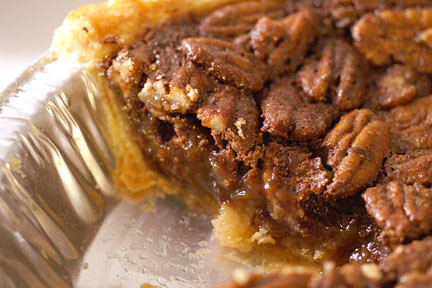
It will be messy when you cut into it - but that's just part of the fun of pecan pie! And if you can't find the frozen crusts and are too overwhelmed to make the crust yourself, you can always try Cassandra's Easy Crustless Pecan Pie.


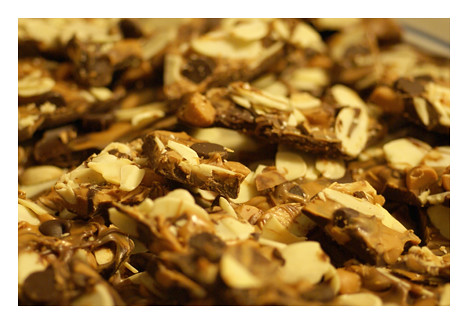
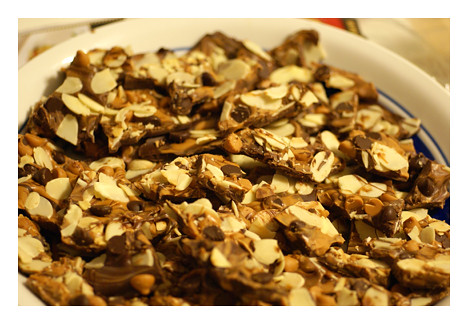
Gluten-Free Dark Chocolate Almond Bark Recipe


Dark Chocolate Almond Bark, originally uploaded by A Gluten Free Guide.

As I gear up for my annual holiday soiree, I want to share a quick and easy gluten-free dessert recipe that is sure to please your guests. I made this for a recent party and it was a huge success. I was looking to create something to pair with a decadent Raspberry dessert wine that I originally discovered during a Sunday afternoon in Brooklyn with Chris and Jed.

I turned to my favorite resource for kitchen experimentation – the book Culinary Artistry. It gives a list of food matches made in heaven. After pouring through the pairings, I knew raspberry, dark chocolate, caramel and almonds were the flavors I wanted to bring together. I decided to adapt an old standby, my Vanilla Butterscotch Bark recipe. I kept the butterscotch and used dark chocolate and almonds. The result was incredible on its own and even better when paired with the luscious flavor of the Bonny Doon Raspberry Framboise.

This is great for a party or would make a lovely homemade gift.

Good luck planning your holiday festivities – enjoy the season!


Gluten-Free Dark Chocolate Almond Bark Recipe

2 cups gluten-free semi-sweet chocolate chips (I used Guittard brand)
2 cups gluten-free butterscotch chips (also Guittard)
¾ cup toasted sliced or slivered blanched almonds

Prep work - Toast the almonds in the oven at 300 degrees for 6-8 minutes

Reserve ¼ cup each of the chocolate and butterscotch chips.

In a microwave safe bowl, melt the chocolate chips, 2 minutes on high, stirring every 30 seconds.

Spread the melted chips on a cookie sheet lined with wax paper.

Melt the butterscotch chips with the same method. Pour the butterscotch mixture on top of the chocolate and swirl with a toothpick.

Spread the reserved chips and almonds throughout the tray, gently pressing them into the mixture. Refrigerate for one hour. Break into pieces before serving.


If you are looking to serve a savory snack while entertaining - try this Rosemary Roasted Cashew Recipe - it's another dish your guests will adore!

Ms. GF Guide's Summer Soft-Serve Summary


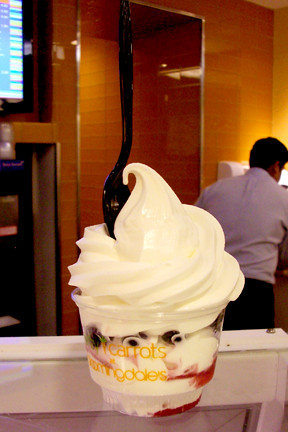
40 Carrots Yogurt, originally uploaded by A Gluten Free Guide.

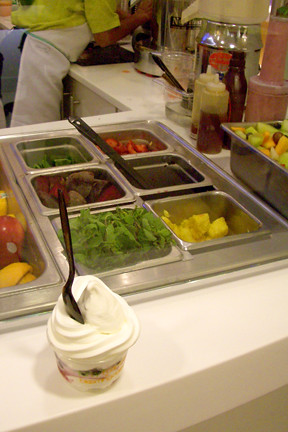
Yes, Bloomingdales even has expensive Frogurt. You, the readers, demanded it - so I was forced to deliver. After my reviews of the gluten-free soft serve options at Tasti D Lite, Pinkberry, and McDonalds, I was asked to investigate the gluten-free status of "forty carrots" frozen yogurt at Bloomingdales. Good news for everyone looking to spend even more money satisfying your sweet tooth - forty carrots' frogurt is gluten-free.


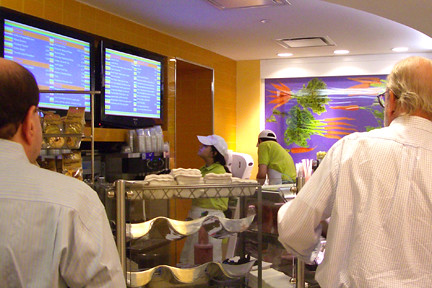
After following the many signs necessary to navigate oneself to the forty carrots restaurant tucked away on the 7th floor of Bloomingdales' 59th Street location in Manhattan, I found only a short line of customers waiting to be served (nothing compared to the throngs of people currently crowding Pinkberry). When my turn came, I asked if they had ingredient or allergen information. Yes, he nodded, and delivered to me my very own nutrition and ingredient flyer. I stepped aside and read furtively ................ yes, I could indulge.


The regular toppings are in a cross-contamination minefield, so I didn't bother with the yummy sounding coconut or goji berries. The fresh fruit toppings are in an entirely different area, so I felt relatively comfortable with my choices.


I ordered a plain small with fresh blueberries. $4.50 for a small plus $2 for the single fruit topping meant my total with tax was...choke...$7.04!!! Man I hoped it was good. I let it get a little melty before digging in - I enjoy SOFT ice cream or froyo. It is quite tasty. It has a bit of the tang sought out at Pinkberry, but it's a little more mellow and creamy. It was delicious, though for me I don't know that it is worth the price or the hassle of navigating the halls of Bloomie's.

The famous forty carrots dessert is made by a company called The Wards Ice Cream Company in Paterson, NJ. It is branded as "Frogurt" which coincidently is served at a bakery right by my apt (I will have to investigate pricing outside of the luxe Bloomingdales environs).


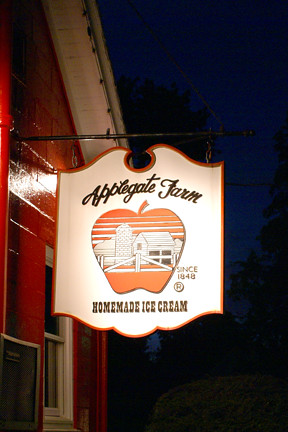
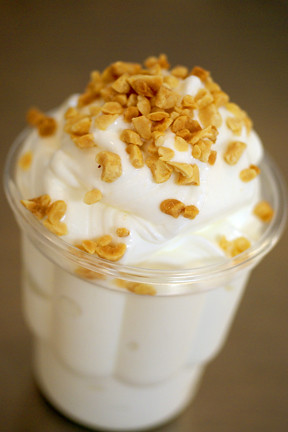
Probably the best tasting soft-serve I had this summer was after the Gluten-Free BBQ in NJ. We went to Applegate Farm, where I enjoyed a vanilla soft-serve that rivaled the Frozen Dairy Bar Ice Cream I had during my childhood summers in Virginia. Unfortunately it was too dark to get a photo of the creamy deliciousness.


But given price, convenience and calorie considerations I still have to give top billing to McDonald's. Yes, this Gramercy Tavern loving, jicama eating, quinoa making, GF Guide LOVES McDonald's ice cream. What is your favorite soft-serve?


Bloomingdales plain low-fat frogurt contains: Yogurt cultured Grade A milk, sugar syrup, yogurt cultured nonfat milk, corn syrup sodium citrate, mono and diglycerides, carbohydrate gum, locust bean gum, polysorbate 80, guar gum and diocityl sodium sulfosuccinates. A 4 oz serving contains 100 calories, 2 grams of fat, 2 grams of protein, and 20 grams of carbohydrates.

Gluten-Free Ice Cream on a Global Scale

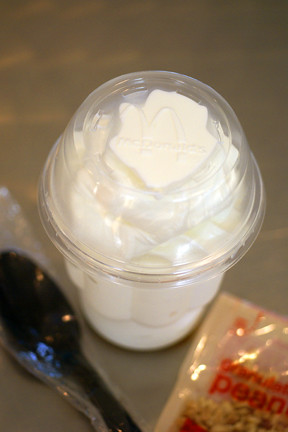
I love well-prepared food - even as a child I was never eager to eat at any fast food "dining" establishments. So it is with some surprise that my friends greet my frequent pleas to go to McDonalds. I can’t tell you the last time I ate a full meal at this American institution, but in the last month I have had dessert there more than once a week. Even before going gluten-free, McDonald’s Ice Cream held a special place in my heart.


I remember going to McDonald's with my Mom and brother whenever the coin tray in the car was full enough to purchase three cones. I traveled throughout Spain with friends after graduating from college – rather than spend $4 on imitation gelato (I was a little bit of a snob about real Italian gelato) I would spend less than 50 cents on a refreshing vanilla treat. Now that I’m in NY, as friends and coworkers would stop at the ubiquitous Mr. Softee trucks, I would try to convince them of the error of their ways, as equally easy to find were the golden arches with a more tasty and less expensive cone and sundae offering.

Once I started living gluten-free, I was pleased to discover that I didn’t have to give up McDonald’s Ice Cream. While I’m not advocating basing one’s entire diet on McDonald’s food, the Vanilla Reduced Fat Ice Cream is surprisingly low in calories - 150 per serving. I usually order a “plain sundae with peanuts” since I can no longer have the cone. I don’t usually want the double calories that come with the decadent hot fudge or caramel sauce, though they are occasionally worth the splurge.


Even when dining at restaurants with gluten-free dessert options, I frequently ask my friends to indulge me with a trip to McDonald’s. My cousin Lisa looked at me as though I were crazy when I first suggested MickeyD’s last summer. After much cajoling, she eventually agreed. I paid the $1.50 for her sundae since she was such a good sport (at some McDonald’s the sundae is on the $1 menu – so you can look out for those extra savings). She was not disappointed. Later that summer, she informed me I should ask for the sundae without the top – that way she usually got extra ice cream. I was proud as the teacher had become the student.


After reviewing Pinkberry and TastiD, McDonald’s frozen dessert comes out on top for taste and price. While the McDonald’s version does have 3.5g of fat, the overall calorie count is still low. And best of all, you can find this gluten-free goodie almost anywhere in the world.


Gluten-Free at Tasti-D


Tasti D Lite, originally uploaded by A Gluten Free Guide.

Tasti D Lite is a New York institution. The chain offers a range of “low-calorie” desserts for a price that’s arguably too high. But despite that and the fact that it tastes only slightly better than the ice milk served in my college dining hall, I still find it holds an inexplicable lure.

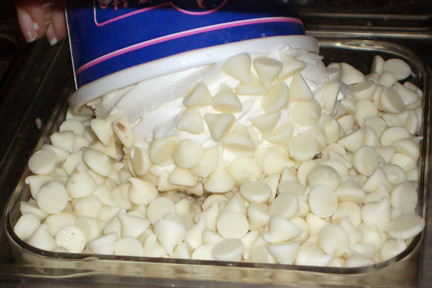
When I was diagnosed with Celiac almost three years ago, I went in for my endoscopy after eating a slice of pizza and a large Tasti-D Lite waffle cone. (For a proper diagnosis you should keep eating gluten until you have the endoscopy.) The ingredients at the time included oat bran. Since then, Tasti-D has changed its formula and confirmed via email that the vanilla flavor is gluten-free. I was unable, however, to get a response about the gluten-status of their other flavors.

I don’t feel safe getting any of their toppings – who knows if there was a waffle cone sitting in the peanuts.


And their method for putting on toppings is rife with cross-contamination potential.


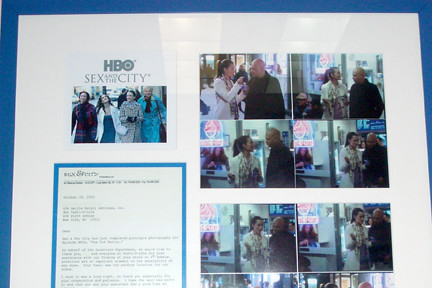
Tasti-D Lite survived the Crema Lita attack and the lines are still long even with the current Pinkberry invasion of Manhattan. Its status as a NY institution was confirmed when it made an appearance on HBO’s Sex and the City.


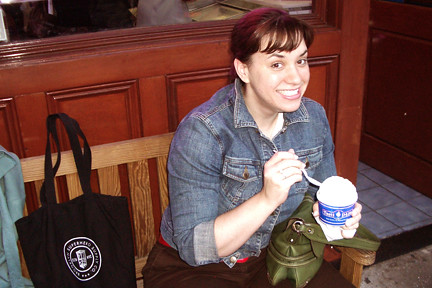
I know that Tasti-D Lite will never taste as good as real ice cream, but the pleasure I find in spending a warm summer evening with a friend walking and eating a cup of vanilla “frozen dessert” makes up for anything it may lack.


Chocolate To Lift Your Spirits


The last two months have been pretty amazing for this Gluten-Free Guide. I fell in love, was featured in a Gluten-Free story in the NY Times (wow, I am truly honored) and turned 29 (for the first time).

What exactly does one do to celebrate a 29th birthday? I decided to have an iron-on shirt party. I’m not crafty by nature and my iron had spent the last year sitting unused in my linen closet (much to Mom’s chagrin). The craftiness was surprisingly fun, but, of course, my favorite part of entertaining was planning the menu.

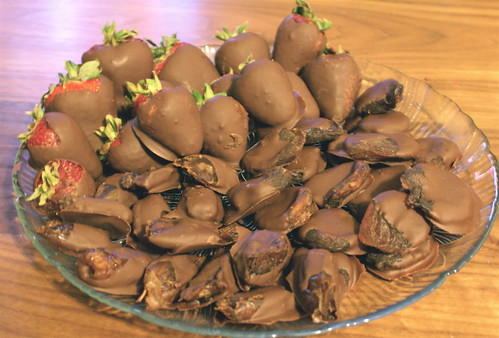
What would be good on a hot July day? I decided to serve root beer floats, a la Bobby Flay, my standard chips, dips and crudite, some fun new cheeses, and homemade chocolate dipped fruit. Originally, I was planning on making Friendship Bars, but they seemed a little too heavy for a summer menu. So instead, I used the dates and apricots to extend the chocolate indulgence.

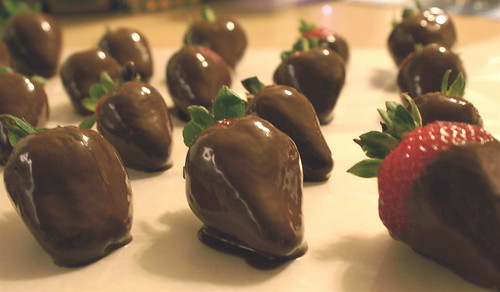
Next time you see expensive chocolate covered strawberries at the store, walk on by, they are surprisingly easy to make, and the homemade ones are much easier on your wallet. These are going to become a new entertaining staple for me; the key is buying the best chocolate you can find.


(Gluten-Free) Chocolate-Covered Fruit

1 pound fresh strawberries washed
8 ounces dried Turkish apricots
8 ounced medjool dates
8 ounces E. Guittard 72% Cacao Bittersweet Chocolate, chopped
8 ounces E. Guittard 38% Cacao Milk Chocolate, chopped
2 Tablespoons shortening

In a double boiler, gently melt the chocolate and shortening over simmering, not boiling water. Be sure to stir well to fully incorporate the shortening. Keep the chocolate at a low heat and gently dip the fruit in the mixture. Place each piece on a piece of wax paper and transfer to the fridge for 30-60 minutes to set. You may have to re-warm the chocolate a few times as it starts to set.

Note: Taking a cue from my experiment with fondue, I mixed two types of chocolate, but if you only have one it will work just fine. Also, I don’t have a double boiler so I set up a large pyrex bowl over a saucepot with simmering water.

If you want to get more creative, try chopping up nuts or melting white chocolate for an extra bit of color and flavor. Substitute cherries, apples or other dried fruit. Though really, what more do you need than chocolate and strawberries?

Friendship Bars with a Gluten Free Twist

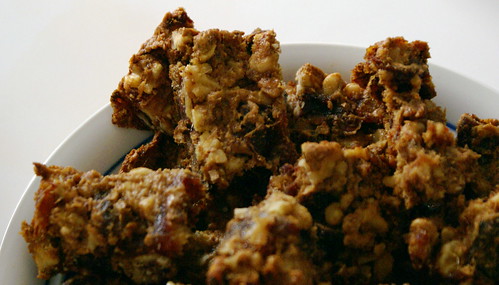
One of the new recipes I tried this weekend (when my gluten free bakery dreams were crushed) turned out so well it would seem that fate had its wise hand in it all from the beginning. What better to make for a group of girlfriends sitting around in a NY apartment watching hilarious television than a treat called a Friendship Bar? (Our sides and cheeks were hurting from the hilarity on The Office and Da Ali G Show in case you were wondering.)

I stayed mostly true to David's original recipe. I used sorghum flour and added a 1/2 teaspoon of almond extract. The almond extract adds a really nice hint of flavor. Since I wasn't able to find the "Baker's Edge" pan he raves about in his post, I decided to bake the mixture in two loaf pans rather than the 8X8 pan in order to maximize the "crusty edges" of the batch.

These are so chewy and perfect - you simply must try this recipe. I still can't believe there is no added fat other than the walnuts. Let me know how they turn out for you.

Gluten Free Friendship Bars (adapted from David Lebovitz's The Sweet Life in Paris)
About 16 bars


6 tablespoons sorghum flour
1/8 teaspoon baking soda
1/8 teaspoon baking powder
1/4 teaspoon salt
6 tablespoons packed, light or dark brown sugar
2 cups walnuts toasted and coarsely chopped
1½ cups dates, pitted and quartered
1 cup dried apricot halves quartered
1 extra large egg
½ teaspoon vanilla extract
½ teaspoon almond extract

Preheat oven to 325 degrees


Line two 8X4-inch loaf pans or one 8-inch square pan across the bottom and up the sides with aluminum foil

In a large bowl mix together the flour, baking powder, baking soda, and salt. Add the brown sugar and stir, breaking up the packed sugar. Add the walnuts, dates, and apricots. Use your fingers to mix separating any pieces sticking together, ensuring that all of the fruit is coated with the flour mixture.

Beat the egg, vanilla, and almond extract in a small bowl, then mix with the fruit and nut mixture until evenly coated. Spread the mixture in the baking pan with your hands and press to even it out. It is pretty gooey at this point.

Bake for 35-40 minutes until the batter is golden brown and has pulled away just-slightly from the sides of the pan. Cool the bars in the pan. It will be tempting to take them out of the oven too early but the bars won't set if you do. Once the bars are cooled, peel off the foil, cut and serve.

A New Gluten Free Cookbook Find!

I recently received a preview copy of Donna Klein’s new cookbook, "The Gluten Free Vegetarian Kitchen." I love cookbooks but didn’t have high hopes about this particular one. Donna Klein is a well-known cookbook author but what did she know about being gluten-free?

Well, I must say I am truly impressed. The book does a good job of outlining the “Celiac Diet” and places where the perfidious gluten can hide. Ms. Klein makes great use of the alternative flours and gluten free ingredients, highlighting the natural flavors of gluten free food. For a meat-eater like me, it was useful to have all of the recipes categorized by Dairy-Free, Egg-Free, Vegan etc. (Now I can have a dinner party for my vegan friends without “contaminating” their food with hidden animal products.) As a diabetic, it was great to see which recipes were labeled as “low-carb” AND have the nutrition facts for each recipe.

OK, that’s all well and good, but would the food actually taste good? My trips to vegetarian restaurants with gluten free menus confirmed that elminating meat doesn't have to hamper you. I had a great time pouring through the cookbook selecting which ones to make first. I decided to have a dinner party with a few friends (Celiac and not) to give the recipes a test run. It was a bit risky to make all new recipes for a dinner party, but everyone was warned and seemed up for the adventure. Well, the risk paid off and everyone loved the food. Meat-eaters, gluten-eaters and the vegetarian-Celiac all gave the recipes rave reviews. (My only comment is that many of the recipes need more salt than is called for, but that is easily remedied.)

I will be highlighting items from the dinner party over the next few weeks – Toasted Tex-Mex Almonds, Spicy Jicama Chips with Guacamole, Black and Green Olive Tapenade, Parmesan Cheese Crisps, Wasabi Cream Cheese Spread, “Creamy” Cauliflower Soup, Sante Fe Style Quinoa Salad, and Pizza made with a Zucchini Crust. The taste memories are flooding back as I type....

Today, let’s start with dessert. I don’t remember enjoying a dessert this thoroughly in a long time. I took Donna’s recipe for Indonesian-Style Warm Bananas in Cinnamon-Coconut Milk and paired it with Gluten Free Gingerbread and low-fat frozen yogurt. The combination of flavors, textures, hot and cold leaves my mouth watering just from the memory. Give it a try and I promise you won’t be disappointed!

Indonesian-Style Warm Bananas in Cinnamon-Coconut Milk (from Donna Klein’s "The Gluten-Free Vegetarian Kitchen")

4 large ripe yet firm bananas
1 ½ cups light coconut milk
3 tablespoons sugar
1 teaspoon of ground cinnamon

Peel the bananas and slice into bite-sized pieces. In a medium saucepan, bring the coconut milk, sugar and cinnamon to a gentle boil over medium-high heat, stirring until the ingredients are incorporated. Add the bananas and let mixture return to a boil. Reduce the ehat and simmer gently, stirring occasionally, until the bananas are tender but not mushy, 2 to 3 minutes. Serve hot, with an additional sprinkling of cinnamon, if desired.

Chocolate Fondue - Dip Away!

A luscious, rich chocolate fondue is a sure crowd pleaser. Dipping various treats into warm chocolaty goodness is the perfect luxury on a cold winter evening.

When planning a menu for a small Valentine’s gathering, I was told emphatically that it just wouldn’t be complete without chocolate. As I’ve said before, I don’t like chocolate so it hadn’t even occurred to me. Well, I knew I was up for the challenge. Figuring out the best recipe for something that you don’t like to eat is possible with research and focus on the best possible ingredients.

I started my search online, reading every chocolate fondue recipe I could find. Some used corn syrup, others butter. A few included caramel or peanut butter. I knew I wanted something with clean flavors so that the chocolate could be the star. The fun and variety would come with the treats dipped in the chocolate.

After all of that research, I decided to see if the Guittard web site had any recipes. They make the most incredible Vanilla and Butterscotch chips (highlighted in this recipe) and I knew that their chocolate had a reputation for being one of the best. (I also had confirmation from a representative at Guittard that all of their products are gluten free.)

Sure enough they had a simple formula for creating an exquisite fondue. Everyone who indulged gave it rave reviews.

Chocolate Fondue (adapted from Guittard Chocolate Company)

12 ounces E. Guittard 72% Cacao Bittersweet Chocolate, chopped
12 ounces E. Guittard 38% Cacao Milk Chocolate, chopped
1 cup heavy cream
½ cup whole milk

Gently melt all ingredients in a double boiler set over simmering (not boiling) water using low heat. To serve, transfer the fondue to a warmed ceramic dish or fondue pot. Note that the fondue will thicken as it cools.

I didn’t have a double boiler, so I set up a large pyrex bowl over a saucepot with simmering water. If you are using a fondue pot with a sterno flame, be sure that you can control the heat. Too hot and your chocolate will burn.

This recipe will easily serve 15-20 people. As far as what to dip? You are limited only by your own creativity. I selected gluten free macaroons, animal crackers, marshmallows, strawberries, pineapples and bananas.

Celebrate Love with a Gluten Free Cupcake


Valentine's day is the perfect opportunity to flex your gluten free baking muscles and create some sweet treats.

Cupcakes have been the trendy baked good of choice in Manhattan ever since the Magnolia Bakery introduced us all to the delight of vanilla buttercream frosting. When I moved to NYC, it didn’t take long before my cousin brought me to the West Village to experience Magnolia’s famous cupcakes. When I found out that they had a cookbook I started experimenting with their recipes on my own. I discovered that it wasn’t that difficult to make the frosting and that a yellow cake mix tasted just as good as the much more labor intensive cupcake recipe. I started bringing my “Magnolia Style” cupcakes to dinner parties, birthday parties, and any celebration in need of such an indulgence.

Once gluten was banned from my life, I went in search of a gluten free cake recipe that rivaled my previous concoctions. I spent hours on the weekend trying every vanilla and yellow cake mix and recipe I could find. I made my roommates try all of the results.

“Too grainy.”
“Tastes like cornbread”
“Ummm, not good”

They would look at me with sad eyes, knowing how much I needed to find a recipe that could bring back some sense of normalcy to my new gluten free lifestyle. After trying upwards of 15 recipes and mixes, I started to give up hope that I could make cupcakes that rivaled my old glory.
The Really Great Food Company yellow cake mix is pretty good and the Dowd and Rogers Dark Vanilla cake mix with chestnut flower is delicious in it’s own right, but it's not the same as a simple yellow cake. While I have embraced many of the new flavors and textures that gluten free cooking has brought into my life, I needed that small yellow cupcake. Thankfully, shortly after I had given up hope, someone on the Delphi forums posted a surprisingly simple technique for yellow cake that she claimed had ‘never-failed’ her. I decided to give it one more shot but didn’t get my hopes up. I mean, orange juice in a cupcake recipe? How could that be any good? Wouldn’t it taste like oranges? Well, it worked and it worked really well. It’s moist and delicious and just as good if not better than any ‘gluten’ cupcake. The hint of orange is only detectable when you know it’s there.


Celebratory Cupcakes

Yellow Gluten Free Cupcakes (adapted from the Celiac Disease Delphi Forums)
1 package Gluten Free Pantry Old Fashioned cake mix*

1 package Jello vanilla instant pudding
1/2 cup sugar
4 extra large eggs room temperature
1/2 cup canola oil
3/4 C orange juice
1 Tablespoon plus 2 teaspoons good vanilla extract

*Do not follow the directions on the package

Preheat the oven to 350 degrees.

Mix the wet ingredients in a large bowl. Add the dry ingredients and beat on high speed for two minutes.

Line a muffin tin with cupcake liners. Fill liners 2/3 to ¾ of the way full.

Bake for about 25 minutes, until the cupcakes are golden and a toothpick inserted comes out clean. If making a cake, grease the pan first, pour in the mix and bake for 40-45 minutes.

Vanilla Buttercream Frosting (adapted from Domino Sugar)
1 pound confectioner’s sugar
1 stick (8T) of good unsalted butter, softened
2 teaspoons good vanilla extract
¼ cup of milk

Combine half of the sugar with the butter and beat on low speed. Add the wet ingredients and beat. Slowly add the rest of the sugar while mixing until combined. Beat on medium-high speed for at least two minutes until the frosting is smooth and creamy. If you want the frosting to be a little bit stiffer (better for decorating) add powdered sugar a couple of tablespoons at a time. Frost cupcakes with icing at room temperature.

Tip - I find if I am going to a party that cupcakes are difficult to transport already frosted. Instead I keep the cupcakes and frosting in separate Ziploc bags or Tupperware containers and then frost them quickly upon arrival. They may not be pretty but they will taste good. This recipe stood up against cupcakes made by a professional working at Martha Stewart! Making homemade frosting is key – it doesn’t take that much extra effort on your part but it will take your baked goods to the next level.

Gluten Free Oatmeal Cranberry Delights!


When I was first diagnosed with celiac disease I was surprised to find out how much I would need to be vigilant about cross-contamination. In fact, oats are forbidden on a gluten free diet because they are contaminated by wheat in the production process.

In the last two years there has been some controversy in the Celiac community surrounding the safety of steel-cut oats such as McCann’s Irish Oats. Because of the length of time it took me to get my antibodies down I have not been comfortable using McCann’s, however I did decide to try a new brand of “gluten free oats” produced by Cream Hill Estates. They are quite expensive - $5 for a 500g box. But for someone who used to have oatmeal for breakfast everyday – I was glad to have the option even if it was pricey.

I couldn’t wait to make oatmeal cookies – my favorite cookie growing up. I adapted the Quaker Oats “Vanishing Oatmeal Cookies” recipe to create a crispy yet slightly chewy gluten free oatmeal cranberry cookie.

Gluten Free Oatmeal Cranberry Delights

14 Tablespoons unsalted butter
1 cup firmly packed brown sugar
½ cup granulated sugar
2 large eggs
2 teaspoons good vanilla extract
1 ½ cups Pamela’s baking mix
2 teaspoons cinnamon
3 cups gluten free oats
1 1/3 cups dried cranberries

Preheat oven to 350 degrees.

In a large bowl, cream together the butter and sugars with a mixer at medium speed. Add the eggs and vanilla and mix until smooth.

Gradually add the baking mix and cinnamon and mix on low until smooth.


Stir in the oats and cranberries until evenly distributed.


Drop in small teaspoons-full on a silpat or slightly greased cookie sheet. Allow plenty of room for them to spread during baking. Bake for 10-15 minutes. Cooking times will vary according to the size of the cookie. Let cool before removing from the silpat or cookie sheet or they could crumble.

Adjustments for other gluten free flour mixes – because Pamela’s mix includes baking soda, salt and additional fat I adjusted the recipe accordingly. If your flour mix doesn’t have any fat, increase the butter by two tablespoons. Add 1 teaspoon baking soda and ½ teaspoon salt with the dry ingredients if your mix doesn’t include them already.

My step-father claims to be an “oatmeal cookie expert” and he couldn’t get enough. I hope you enjoy them as much as we did!

Gingerbread Cupcakes with Cream Cheese Frosting


My gluten free gingerbread cupcakes were the hit of the party. I used the Gluten Free Pantry’s Mix, doubling the ginger, but the key to this dish was the frosting. I made a luscious cream cheese frosting that was a perfect compliment to the sharp spice of the gingerbread. I planned on doing some experiments with ginger or nutmeg in the frosting but decided that simplicity was best.

In lieu of sprinkles, I tried shaving crystallized ginger with my microplane. Unfortunately the ginger I bought wasn’t firm enough to get a nice topping. Rather than admit defeat, I chopped the ginger into small pieces to top half of the cupcakes. The presentation wasn’t as lovely as the shaved ginger would have been, but they were mighty tasty. (I chose not to put the ginger on all of the cupcakes as the flavor is quite strong. While I can’t get enough of it, I realize not everyone feels the same.)


Gluten Free Cream Cheese Frosting (adapted from the Magnolia Bakery Cookbook)

2 eight-ounce packages cream cheese, softened slightly, cut into small pieces
½ cup (1 stick) unsalted butter, softened slightly, cut into small pieces
2 teaspoons vanilla extract
5-5 ½ cups sifted confectioners’ sugar

In a medium-size bowl, on the medium speed of an electric mixer, beat the cream cheese and the butter until smooth, about 3 minutes. Add the vanilla extract. Gradually add the sugar and beat until well incorporated.

With 5 cups of sugar the icing will be slightly runny. If you want a stiffer icing, keep adding sugar until it reaches the desired consistency.

This frosting worked well with the gingerbread but would also be great with other quickbreads or hummingbird cake.

Gluten Free Vanilla Butterscotch Bark


I stumbled upon this recipe originally made with milk chocolate and macadamia nuts. While I’m sure the original is delicious, I don’t care for milk or dark chocolate and didn’t have any macadamia nuts on hand.

This treat is delightfully sweet and smooth. It’s also easy which was of tantamount importance for this celebration with limited preparation time.

Vanilla Butterscotch Bark

2 cups gluten free Vanilla Chips (I used Guittard brand)
2 cups gluten free Butterscotch Chips (also Guittard)
¾ cup toasted chopped pecans

Prep work - Toast the pecans in the oven at 300 degrees for 8-10 minutes then chop roughly

Reserve ¼ cup each of the vanilla and butterscotch chips.

In a microwave safe bowl, melt the butterscotch chips, 2 minutes on high, stirring every 30 seconds.

Spread the melted chips on a cookie sheet lined with wax paper.

Melt the vanilla chips with the same method. Pour the vanilla mixture on top of the butterscotch and swirl with a toothpick.


Spread the reserved chips and pecans throughout the tray, gently pressing them into the mixture. Refrigerate for one hour. Break into pieces before serving.

Gluten Free Orange Vanilla Dream Cookies


I was invited to a Cookie Exchange party this weekend by my lovely friend Molly. The rules were to bring 5 dozen cookies (no chocolate chip) and an empty box so that you could take home some of the cookies everyone else brought. I was excited to have an excuse to make some cookies even though I knew I wouldn’t be able to take anyone else’s cookies home with me.

Since the party was on Saturday I decided to spend Friday night at home experimenting in my little gluten free kitchen. It was 5 degrees Fahrenheit outside so I couldn’t imagine a better way to avoid exposure to the elements.


When I bake gluten free versions of cookies, cakes, pies etc I do not accept anything less than delicious. I don’t see any reason to waste the calories or effort on gluten free substitutions if they are just “so-so.” I decided to try a new flour mix with a tried and true recipe. That said, it takes patience and experimentation to develop the correct formula with gluten free baked goods.

Here is the recipe I started with:

Gluten Free Orange Vanilla Dream Cookies (adapted from the Magnolia Bakery Cookbook)

2 cups gluten free flour mix
¾ teaspoon baking powder
½ teaspoon salt
1 cup (2 sticks) unsalted butter, softened
½ cup granulated sugar
½ cup firmly backed brown sugar
1 large egg, at room temperature
1 tablespoon grated orange zest
1 cup vanilla chips (I used Guittard brand)

Preheat oven to 350 degrees

Sift together the dry ingredients. In a separate bowl, cream the butter with the sugars until smooth. Add the egg and mix well. Add the flour mixture and beat thoroughly. Stir in the orange zest and vanilla chips. Drop by rounded teaspoonfuls onto parchment paper or aluminum foil leaving several inches for expansion. Bake for 10-12 minutes or until lightly golden brown. Move the foil or parchment paper to a rack to cool then remove the cookies from the foil or paper once the cookies are completely cool.

The “gluten” version of the recipe calls for slightly more flour but the gluten free flour blend I had been using needed to be cut to 2 cups. So this time, experimenting with Pamela’s baking mix I tried baking a test cookie after adding the dry ingredients but before adding the zest or vanilla chips.


It tasted great but flattened out completely. So I added more of the gluten free mix and stirred in the zest and vanilla chips. Well, it wasn’t quite the right combination because this is what I how my first tray turned out.


Ok, so I knew I needed more flour. When I confirmed that I had enough flour, by testing one cookie rather than a whole tray, I had to add an extra egg white for texture and more orange zest and vanilla chips to balance out the flavor. I like the flavor and convenience of Pamela’s baking mix. The final version turned out great. The cookies were light and crispy, as good as any of the other cookies at the party. (or so I am told since I could only have the gluten free ones!)